#18: May 2023 Roundup
This email went out to jacobparis.com's Remix subscribers at the end of May 2023. Those archives and subscribers have been merged into Moulton, so if you were a Moulton subscriber you will not have received this.
Hey folks!
If you’re seeing this, it means that at some point in the past few months you read one of my articles and signed up to hear more, and you have managed to survive all of my email issues.
I still haven't gotten the hang of this email thing.
A few folks reached out and said they didn't get their confirmation emails when they subscribed to this list. Upon investigating it seemed my Zapier integration broke.
Connecting my website directly to ConvertKit means using their client libraries, which means I have to bundle a bunch of JS to make it work. I don't like including third party libraries, especially ones that add tracking cookies and risk the privacy of my readers.
I'm not sure if I'll stick with ConvertKit long-term. I can't even use their web UI to write this email without losing data because it keeps transforming my text, automatically removing apostrophes and otherwise providing an incredibly janky experience.
So this whole time I've been using a simple backend integration with Google Sheets, sending new subscribers to a spreadsheet over Google's REST api (no lib required) and then using Zapier to pipe it into ConvertKit.
The idea here is I can run any integration on that sheet without having to code anything new. If I want to switch away from ConvertKit, there's no sunk cost, and I can set up notifications or whatever else I want.
But at some point Zapier stopped noticing changes in the sheet, so I've had weeks where no one was actually making it into the list. Turning the integration off and back on again seems to have fixed it for now, but I'm actively looking for a better solution.
So if you're reading this, you're one of the lucky ones who made it through the gauntlet of my broken email setup. Congrats!
🔥 All subscribers can have access to my source code
One of the big new things this month was creating a new organization on GitHub for my website and code examples.
For most of the past year, my website has been one app in an Nx Monorepo with several other production applications. The idea behind that was to make it easier for me to share code between projects and increase my development velocity by having a single codebase to work in.
That didn't end up happening. I vastly overestimated the amount of code I'd be able to share between projects. Even things that looked the same (like auth setups) ended up being different enough that I couldn't share them.
What actually ended up being modular were the individual examples themselves. I didn't need to run a whole new Remix app for most of them. They could just be a few routes on my website, which is what I ended up doing.
So I moved my site out of its monorepo and into its own private repo in a new organization, and I'll be sending out invites to all my subscribers.
I'm quite far behind on sending the invites, and they also expire after 7 days if they aren't accepted. At any time if you don't have access and want it, reply to this email and I'll send you a new one.
- I haven't moved everything here yet
- This is probably a good place to show past newsletter issues as well, so people who subscribe later can see the earlier content once they're in the repo.
🔥 My website makes more sense now
In the last issue I asked for feedback and all the feedback was about how bad my website was.
- All the content was split into three categories: guides, blog posts, and cheatsheets. Each of those was divided into dozens of tags.
- I could not tell you what the qualifying criteria were for any of those. Given a random article, I couldn't tell you which category you should click to find it.
- On a mobile device, there were so many tags that selecting a different tag didn't change anything above the fold, so there was no visual feedback that anything happened at all.
- The font size for code examples was too large and made basically every line of example code soft-wrap to the next line, making it hard to read.
- Empty lines in code examples were omitted entirely, making it harder to read.
So… I fixed all that.
I got rid of the sidebar too. There's no need for an application style sidebar here. I don't have nearly enough pages for that.
Now there's a simple sticky header that combines the two pages of my site (home and content) with the social links.
The homepage is dedicated to featuring the content I want to highlight most. This will change often as I change my mind often, but I think we're trending in a much better direction.
🔥 Image uploads in Remix like Slack's message input
When developers start to embrace a new idea, they often go overboard.
Remix is big on forms, and it can seem like a natural fit to try to handle your file uploads "the remix way" by uploading them along with your forms.
If the files are going to end up in cloud storage, like on AWS S3 or Cloudinary or Cloudflare R2 or Cloudflare Images, then I don't think that's the right approach. For a few reasons
- By acting as a proxy, you're adding a lot of latency to the upload process
- You have to cover the bandwidth costs of every file
- The file upload is the most likely part of the form submission to fail, so you're adding a lot of complexity to your error handling
Instead, I think it's better to have users upload their files directly to the cloud storage provider, and then send the URL to your server.
As inspiration for this approach, I first looked at Slack. When you upload a file to Slack, even before you send the message, it gets uploaded to their servers. You can upload a few images and half write a message on your phone, then switch to Slack on your desktop and you'll have the draft message and all the images sitting there waiting for you to send.
Rebuilding this in Remix was a fun challenge.
- Users select images to upload from a file input
- Those images are automatically uploaded in the background to a third-party service. At the same time, the pending images are optimistically shown to the user.
- When the images finish uploading, they become hidden inputs with the URL of the uploaded image and the pending image is replaced with the uploaded image.
- The user submits the form and your server receives the form data, including the URLs of the uploaded images
jacobparis.com/content/remix-image-uploads
🔥 Thumbnails for file input images in React
When the user selects an image to upload, I wanted to show them a thumbnail of the image they selected without having to wait until it's uploaded.
The file input's onChange event gives you a FileList, which is an array of the files the user selected. You can get a blob URL for each file by calling URL.createObjectURL(file), and this url will work in a regular img tag src attribute to display the image.
Great, right?
Not quite. Every time you call createObjectURL the browser will load the entire image into memory and it won't release that memory until you navigate away from the page. Client-side navigations in Remix don't actually unload the page, so the memory will stick around until the user closes the tab.
Upload enough large images and the browser tab will run out of RAM and crash.
So we need to make sure we revoke the Object URL as soon as we're done with it.
My original implementation was to use a ref to the img tag and revoke the URLin the useEffect cleanup function. But I remembered it was considered a poor practice to have asymmetrical effects, where you either create or clean up something in a useEffect but not both.
I asked Twitter about it. Several people told me my implementation was ok. Dan Abramov explained in detail all the ways it was not ok. Apparently, components need to be resilient to being unmounted and remounted with the same props, and my implementation would have caused the URL to be revoked without a new one recreated if that happened.
Thankfully, Dan provided an alternative implementation idea that I was able to adapt to my needs.
The end result is a useObjectUrls() hook that gives me a getObjectUrl(file) function that I can call at any time, and it will clean itself up when the component unmounts.
jacobparis.com/content/file-image-thumbnails
🔥 Show a loading state while images load
There's a moment while showing those pending images when the image completes uploading and the uploaded URL needs to be displayed.
If I just swap out the src attribute from the blob URL to the new one, the image will disappear for a moment while the new one is fetched by the browser.
What I wanted was for the pending image to stick around until the new one had been fetched and was ready to display so there's no flicker.
I came up with an <ImageWithPlaceholder> component that accepts both a src and a placeholderSrc prop. The placeholderSrc is always set to the pending image URL and the src will only take over once the image has been fetched by the browser.
jacobparis.com/content/image-placeholders
Custom fetcher hooks are Remix's type-safe RPCs
I've been hearing a lot about RPCs lately. They're Remote Procedure Calls which is a fancy way to say that you're calling a function on a server from your client.
We already have a way to do that from the browser. It's called fetching an endpoint.
If you wrap your fetch call in a function that abstracts away the URL, you've got yourself an RPC.
There's a wonderful library called tRPC that gives you type-safe RPC calls with a few extra features like caching, cancellation, revalidation, and type-safety. Next.js users love it because it's the first time they've ever experienced a good mutation story.
But Remix already has a mutation story. There's form submissions and actions, fetcher hooks and loader revalidations. Remix has a lot of the same features as tRPC, but it's not as obvious how to use them.
Rather than adopting tRPC, I'm increasingly fond of exporting custom fetcher hooks with data validation built in from each resource route. This builds on top of Remix's existing features and gives you basically feature parity with tRPC.
It feels less like an RPC and more like a custom hook, but the usage is the same:
- each resource route exports functions that the client can call to interact with the server
- the primary way the client interacts with the server is through these functions
- as types are updated on the server, the client will get type errors until it updates its usage of the functions
In addition, you also get benefits that RPC libraries don't provide, such as
- out of the box support for native forms and Form components
- colocation of the server code with the client code, so you don't need a central router file where all your RPC functions are defined
jacobparis.com/content/remix-rpc-pattern
🔥 A love letter to Tailscale
People told me the new Ant Man movie was really bad. Not letting that deter me, I wanted to watch it anyway. After all, it had just been released on Disney+, a service I pay money for every month.
I knew it had been released because I saw announcements about it on the internet. But when I went to Disney+ to watch it, it wasn't there.
Apparently they did not release it in Turkey, where I was living at the time (This email is 2 days late because yesterday I was flying to Las Palmas in the Canary Islands, where I will live for the next two months)
So I fired up NordVPN, a service I pay money for every month, and connected to a server in the US. I refreshed Disney+ and the page didn't load! I checked the network tab in dev tools and it was getting a JSON response saying "Invalid region". They knew I was using a VPN and they were blocking me.
The internet said to try using a higher numbered proxy server. NordVPN has several servers for each country, and the higher numbered ones are newer and less likely to have been blocked already.
No luck. No matter which server or country I tried, I could not get Disney+ to work with NordVPN. (why am I paying for these??)
While I was messing around with the VPN configuration I remembered that NordVPN isn't the only one I had installed. I also use Tailscale, a service that does not charge me any money any month.
If you're not familiar, Tailscale is one of the most magical products I've had the pleasure of using. I avoided using it for ages because reading the docs just didn't make sense. There wasn't enough instruction to figure out how it worked.
It did not need the instruction. It just works.
Tailscale is a wireguard based VPN for peer to peer connections between clients. A year ago I installed Tailscale on my macbook and on my iPhone. On each device, I sign in with my GitHub, and instantly I get a private IP address I can use to access either device.
If I want to debug mobile safari issues on my iphone, I simply navigate to my laptop's Tailscale IP address and it's like I'm working with localhost. I can save a file in VS Code and watch my phone hot reload it.
I also have Tailscale installed in my production servers on Fly.io. When I want to access the prod container, I just ssh with my Tailscale IP and I'm there. I can open that IP in the browser and access any other ports that are open, like Prisma studio if I have that running.
All of my Gitpod workspaces are set up as ephemeral Tailscale nodes too, so whenever I'm coding in a workspace, I can access it with Tailscale, but when the workspace deactivates Tailscale cleans it up.
When I log out of Tailscale, those IP addresses simply don't resolve anywhere. Everything is completely secure.
But back to the topic at hand
- Disney did not want anyone in turkey to watch the ant man
- I was in Turkey and wanted to watch the ant man
- I had Tailscale installed
- I also had Tailscale installed in some Fly containers
- Fly containers can be deployed anywhere in the world
So I googled "tailscale fly github" and the first result was a wonderful GitHub repository that comes preconfigured for getting Tailscale running on Fly, set up to operate as an exit node.
(An exit node means your traffic routes through the VPN and exits on that node, allowing you to appear to the outside world as if you are located at that node)
I fired up the repository in Gitpod so I didn't have to clone it, installed the Fly CLI, logged into Fly, ran fly launch, and then approved it as an exit node in my Tailscale dashboard.
This whole process took less than five minutes, though I already had Tailscale installed on my machine.
As soon as it was done, I refreshed Disney+ and Ant-Man Quantumania was there! I watched it and it was okay.
twitter.com/jacobmparis/status/1661068878309408775
🔥 Crank your Twitter productivity to max with keyboard shortcuts
When I left my job at Gitpod, I had a few Twitter related side projects I was working on.
- An app that let users pre-authorize retweets from their account. So when you launched a new product or had an announcement, you could have it automatically retweeted by anyone in your network who had authorized it. Users could set a quota (like 2 retweets per month) and revoke access at any time.
- An app that helped you unfollow inactive accounts
- A "superhuman for Twitter" custom Twitter client
- A chrome extension that added hotkey hints to Twitter's web UI
I didn't love the twitter API pricing at the time. I was under the free tier and had access to 2 million tweets per month with some pretty strict rate limiting. The cheapest paid tier was an incredibly expensive jump at $150 a month, which was way too much for a side project.
The inactive account unfollower required fetching the last 5 tweets from every account you followed, so it often hit the rate limit and needed to pause for 15 minutes before it could proceed.
I implemented a BullMQ system in Remix to process all the API requests, which paused themselves until the rate limit reset. Lots of fun.
But then the Musk regime decided that they would remove the free tier and charge $42,000 per month instead, so I dropped all my Twitter projects that relied on the API.
The chrome extension for hotkey hints was the only one that didn't rely on the API, so it's still alive and I've used it every day this year.
It just adds little hints to the Twitter UI to show you what hotkeys are available. The new tweet button gets a little CMD+Enter badge, and the like button gets a little L badge.
You can use J and K to navigate up and down through tweets.
It also adds a new feature where you press E to collapse a tweet, minimizing it like you're closing an email. I use this all the time to hide tweets I've already read.
Imagine going through your mentions, rapid fire with your keyboard reacting or replying and then dismissing them with E. After a few minutes, you start scrolling into tweets that are already minimized because you dealt with them yesterday.
It's like Inbox Zero for Twitter!
twitter.com/jacobmparis/status/1663845810977611776
🔥 Pessimistic UI
I think any time the UI interrupts the action the user tried to make could be considered pessimistic UI
- form validation on submit
- "are you sure" dialogs for destructive actions
Manager approved GraphQL refactor for doomed project
This actually happened.
It was the first time I had ever taken time off of work. I was burnt out and needed a break, so I took off three days so I could drive from Toronto to Edmonton and visit my family.
When I arrived after three days of driving I popped into the morning standup to discover the team had decided to refactor all our backend services to GraphQL over the next two weeks.
It took two months.
But it wasn't all bad: we were sort of blocked by the siloed design team, who was busy rethinking what the app should be. So we had a lot of time to work on the refactor, and it was a great learning experience.
I stuck around at that company for far longer than I should have, but all that GraphQL experience eventually became my first Egghead course.
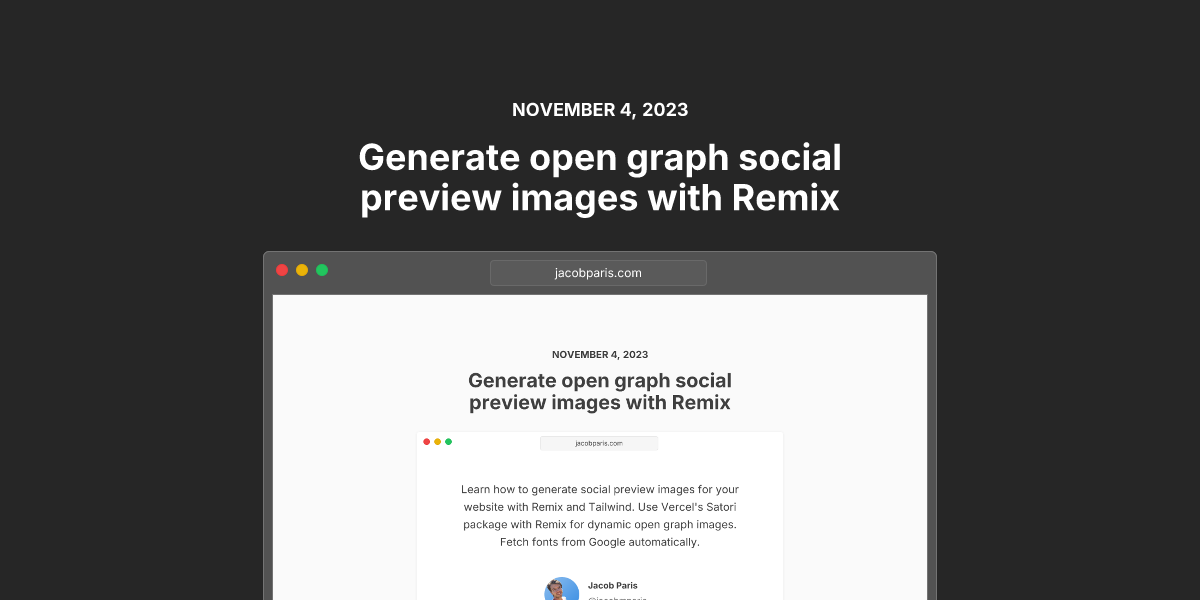
🔥 Add .png to any of my blog posts
Last month I shared how I've been generating open-graph images for my blog posts with a Remix resource route.
The code to generate the URL for the image involved parsing the markdown and creating a bunch of a URL search parameters for the title, description, date, and so on.
That logic took up a bunch of space at the top of my blog post file, and I wasn't super happy with how long the URL ended up being.
So I moved it into a resource route with the same url as my blog post, plus .png at the end.
Clean code, clean urls, and I'm happy
jacobparis.com/content/remix-og jacobparis.com/content/remix-og.png
🔥 Solving hydration errors in remix
I spend a lot of time coding with Remix and a lot of time in the Remix discord. Both activities mean I spend a lot of time working through weird hydration errors.
These errors aren't exactly Remix's fault: they're a natural consequence of the way React works in SSR, but some design decisions in Remix make them more likely to happen.
For example, Next.js is more resilient to browser extensions because Next mounts to a div within the body, while Remix mounts the whole document. If a browser extension adds some scripts to the head, like most do, Remix sees the mismatch but Next doesn't.
There was an open issue to make Remix hydrate the head and body separately, but it looks like the preferred outcome is to fix in React instead. Alternatively, you can use remix-island to get the Next.js behaviour right now.
I would love for upstream solutions to make these go away, but in today's world, these issues are something we need to solve ourselves.
Hydration issues is caused by a mismatch between the HTML in the browser before React runs and what React generates
- The network tab in your browser's dev tools will show you the HTML that the server sends.
- If you remove the
<Scripts />in your root.tsx, Remix will not hydrate and you can use View Source to see the HTML that was present right before hydration. - With the scripts running normally, use View Source to see the HTML that React generated post-hydration.
If you diff these three HTML sources, you can usually find the exact cause of the hydration error.
Common culprits are
- Browser plugins/adblock
- Invalid HTML
- 3rd party scripts
- CSS in JS libs
- utf-8 encoding
- Timezone mismatches
- Non-idempotent functions
jacobparis.com/content/remix-hydration-errors
🔥 Hide hydration issues by rendering on the client
For many hydration issues, we don't actually really care about them. Sometimes we'd be happy just picking the server or client version of something and sticking with that.
However, if javascript fails to load, we only get the server version. In fact, anything we want users without javascript to see MUST be present in the HTML that the server outputs.
So your typical ClientOnly wrapper breaks progressive enhancement.
When I was doing the Slack image uploads demo, I wanted most users to just see the fancy file dropper, but users without JS needed to see the native file input so they could still use the form.
I definitely did NOT want the majority of users (where javascript works great) to have to see it.
It took a few iterations, and I actually published two articles before I came up with this pattern and deleted them. They all redirect here now.
It's called ProgressiveClientOnly, and you can wrap any content you want in it. It will still render their HTML, but it applies a CSS animation that starts hidden by default. After 1 second (configurable) the element appears.
In the ProgressiveClientOnly code, the moment the component hydrates it replaces that animation with a user-selected class.
That means you can wrap a file input with <ProgressiveClientOnly className="sr-only"> and as long as React loads within a second (again, configurable), the input will seamlessly move from "hidden because of the CSS animation" to "permanently hidden" and the user will never ever see it.
If javascript fails, and React never loads to to replace the animation, the input will pop up on its own with CSS, allowing users without javascript to still use the application.
Other use-cases
- An input that gets its default value from local storage will render empty on the server. Hide the whole section it's in and then fade all the content in together with
<ProgressiveClientOnly className="animate-fade"> - Using the same approach, display only the client version of a date to users with javascript, and only the server version to users without it. No one sees any flash of the wrong date.
jacobparis.com/content/remix-progressive-client-only
🔥 Serverside render dates across timezones
As much as I liked being able to hide the dates, sometimes you actually need to show them.
This whole thing would be way easier if browsers would send timezone and locale information to the server with each request, but they don't.
If the server knows what timezone the user is in, it can modify the date so that it will match when rendered on the client.
How do we get that information to the server? We could set a cookie with the user's timezone, but first-time visitors aren't going to have that cookie.
If they don't have the timezone cookie, we could intercept the first request and send a small JS script that will set the cookie and reload the page.
If the user doesn't have JS enabled, we can send that script with fallback headers for Set-Cookie and Refresh that will set the cookie and reload the page. This has a minimum timeout of 1 second, so it's still best to set and refresh with javascript when possible.
So a new visitor would get a very slightly longer first page experience but then our app will have access to their timezone for the rest of their visit.
Kent C Dodds liked this approach enough to include an implementation of it in his Epic Stack, for all client preferences like timezone, locale, and dark mode.
jacobparis.com/content/remix-ssr-dates
🔥 Optimistic UI in modern CRUD apps
This project was fun.
It started from a tweet last month talking about UI expectations in modern apps. There was a lot of discussion about how to handle all the different cases.
Do you save new items automatically, or wait for the user to submit? Do you persist pending form fields to the database or to local storage?
Exploring these design questions took a lot of trial and error, testing out different approaches to see what felt right and what didn't.
But Remix made the actual implementation really easy.
- The declarative data fetching means my optimistic data is just constantly overwritten by the real server data
- Keeping form components uncontrolled means no managing local state
To be honest, I have a really hard time writing about this one. There were a few tricky bits but once I figured out the right abstractions, those became their own reusable hooks with their own articles. (see next two sections)
For the most part, it just worked, and for that reason I've chosen this project to be the first one I turn into a video tutorial series (more on that later).
jacobparis.com/content/remix-crud-ui
🔥 Use reset callback
Optimistic UI for new items usually just means keeping a the "server list" and an "optimistic list" of each item, and adding a new item to the optimistic list when you submit.
Eventually the server will complete its request and reload the data and that's when you need to clear the optimistic list.
This is something a lot of React devs try to solve with a useEffect hook, but it's actually a bad idea, and now the official React docs explicitly encourage the "set state in render" approach.
I've wrapped this up in a custom hook that I call useResetCallback, which takes two arguments:
- a callback
- a state variable that triggers the callback every time it changes
Now I can use this to watch my loader data and either clear or de-duplicate the local optimistic state every time it changes.
jacobparis.com/content/use-reset-callback
🔥 Debounce fetcher
Another thing I needed to do was start debouncing my form submissions.
I wanted each form field to automatically save its changes as the user types, while minimizing the number of requests sent to the server and the chances that the user might accidentally lose their changes
Here's the workflow I ended up with
- Submit onChange with a debounced timeout
- Submit onBlur immediately and cancel the debounce so there's no stale submission when the last timeout completes.
- Give each input its own fetcher so that editing a second input doesn't cancel saving the change to the first input.
Implementing this meant writing a custom hook that wraps the Remix fetcher and adds a debounce timeout.
In my first implementation, I called this useDebounceSubmit and actually only returned the submit function from the fetcher. But a few folks on Twitter asked why I wasn't just returning the fetcher itself, and by the time I was done articulating all the reasons why not, I realized they were all solvable.
So now you have full access to the entire fetcher, which works just like a normal Remix fetcher except it also has a fetcher.debounceSubmit function that you can call.
I would have preferred to sneak the functionality into fetcher.submit instead, but since I implemented the debounce by calling fetcher.submit internally, I couldn't do that without creating an infinite loop. I considered storing the original submit implementation in another method property and accessing from there, but that felt much more hacky than just adding a new debounceSubmit method.
I'm not a Typescript Wizard™, so I had to go to Twitter for some help with the types.
- If I add a new method to the fetcher, typescript complains that the method isn't part of the fetcher interface.
- If I add the method to the interface when I create the fetcher, typescript complains that the method doesn't exist yet.
There's a forbidden zone of type-unsafety between the time where I create the fetcher and when I add the new method. My final solution, which might be a bit overengineered, was to mark the method as optional up front and then assert its existence when I return it
jacobparis.com/content/use-debounce-fetcher
🔥 My first Remix course
I've always been a fan of egghead.io
Each video is designed to teach one thing to one person, and you can tell what that thing is from the title.
Compare that to your typical ten minute youtube video, where you get five minutes of intro, two minutes of "hey guys, don't forget to like and subscribe", and in between you get a few minutes of actual content.
Digression: I was once trying to 3D print a low-res model of the Toronto downtown. The buildings were simple cubes, but standing 3 times their height was the CN tower, a thin spire with a lot of detail at the top. In order to save print time, I wanted to print thick layers for the buildings and then switch to thinner layers for the top of the tower. I knew this was possible, but the software I was using wasn't very intuitive. I searched youtube and scrolled past dozens of informative 30 minute tutorials with tons of content until I found a fifteen second completely silent video that showed the exact thing I wanted to do. Problem solved, and I didn't have to listen to anyone talk about their patreon. The print turned out great too
Becoming an instructor for Egghead was a long-standing dream of mine, but since I didn't have any experience teaching, I didn't think I'd be able to get in.
So I engaged in a sneaky plot to get my foot in the door.
They've written a lot of material on how to put together videos the egghead way, all of which is publicly accessible. I used it as a guideline and put out my own 10 part series on building a sliding sidebar layout with Tailwind and React
On Twitter, I tagged them in the release post "It's not quite @egghead quality, but I just launched a series…" and Joel invited me to join egghead as a Learner's Advocate
Two years later I stepped up into the instructor seat with a free course on using data loaders to batch/cache GraphQL requests. I was qualified to write this because of all the exposure to GraphQL I got from that one manager who had us refactor our entire app to use it.
Now, I'm back working with Egghead again to create a course on Remix. Remember that CRUD example I mentioned earlier? Walking through how to build that will be the first leg of the course. I'm still scoping out the later sections, but getting from a basic TODO app to a linear-like issue tracker is the general idea.
🔥 What's next?
- This roundup was way too long. When I pasted it into ConvertKit, I was over double the permitted length. I either need to talk less here, do fewer things each month, or write more often. Any thoughts?
- Every article on my website has a description that appears in the open graph image and on the search results. None of these are displayed anywhere on my website. I'll incrementally update some of the featured ones to show the description and see how I like that.
- I've started looking into Refine as a library for improving the DX around CRUD apps. It's basically a set of full-stack headless components, like HeadlessUI except with hooks to dispatch REST requests to your backend. I ran into one of the devs while I was in Turkey and he gave me a demo. It looks really cool, and I'm excited to try it out.
- A big part of my next month will be working on the Remix video course with Egghead.
- I've been getting more DMs with questions about Remix and suggestions for new topics to cover. Keep those coming! I love hearing from you all.
- I'm super active on the Remix discord as well, so if you have any questions or just want to chat, come say hi!

